Tours and programs
Waterton Lakes National Park
School programs
Take your classroom outside for the day!
Virtual programming
Join us for exciting virtual education programs, live from Waterton Lakes and the other mountain national parks.
Science and History Day
Find information on the annual Waterton-Glacier Science and History Day.
Explore. Learn. Connect. Join interpreters for a variety of programs in the park, or try some fun activities from home with some Waterton-inspired activities, or with Parka, our mascot!
Activities at home
Windy Waterton
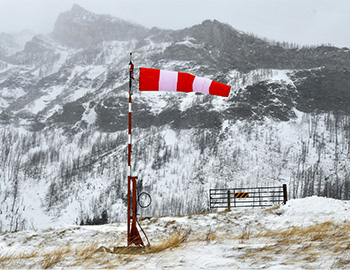
Waterton Lakes National Park is a windy place, especially during spring and fall. There are records of the winds in the park reaching up 150 km/hr! The Waterton Lakes Interpretation Team wants you to get excited about watching the wind.
WOOOSH: We’ve got weather!
What makes the park so windy? A few things come together to create perfect conditions for some mighty gusts. Waterton Lakes National Park is part of the Crown of the Continent ecosystem. It is also the narrowest part of the Rocky Mountains. The mountains found in this area of the range are also a bit shorter than peaks in the Central Rockies. The combination of a narrow mountain range and lower-elevation mountains create a bottleneck for weather systems. Warm, moist air from the Pacific coast collides with cold, dry Arctic air from the east – giving the park incredible windy conditions. Anytime warm air meets cold air, wind is created. This means that spring is a great time for those who enjoy a brisk breeze. You don’t have to be in the park to witness these seasonal winds; follow the activity below to create a windsock and obverse the wind in your area.
Discover more about nature and science in Waterton Lakes National Park
Activity: Make your own windsock
Wind is invisible. We can feel it, but we can’t see it. However, we can see the effect wind has on an otherwise stationary object: think wind blowing through treetops or stealing someone’s umbrella. To watch the wind, we must create an object for the wind to disrupt.
A windsock is a tool used to measure the strength and direction of the wind. It is conical in shape and usually made of fabric, just like a sock! The sock we will be creating will re-purpose some easily found household items.
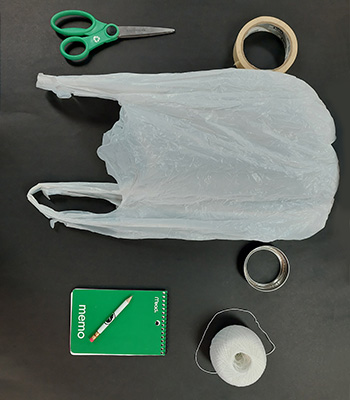
What you’ll need
- Plastic grocery bag
- Threaded part of a mason jar lid
- 1 meter of cotton string
- Scotch tape
- Paper and pencil to record your observations
Craft your windsock
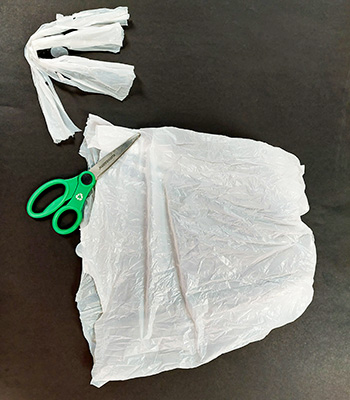
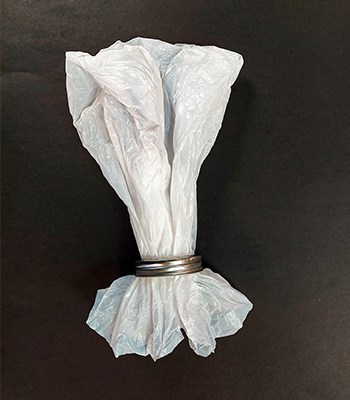
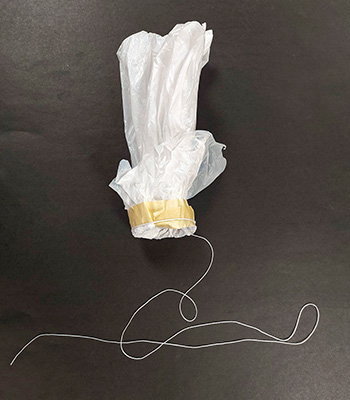
Cut the handles off your plastic bag and feed the bag opening through the mason jar ring. Fold the edges of the bag over the ring and secure with tape. This creates your “sock”. Once the plastic is secure, knot the string to the mason jar ring.
Get outside
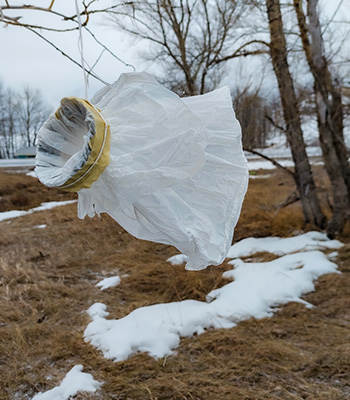
Find a spot outdoors to hang your windsock. Try places like a tree branch or a balcony railing. Tie a double knot to make sure your creation doesn’t blow away!
Get scientific: Observe and record
Observe your windsock every day for one week.
Take notes of the time and weather conditions during your observations.
- Is your windsock is fully or partially inflated, or not inflated at all?
- How does it compare to the day before?
- What direction the wind is blowing?
- Is it the same direction as yesterday, or has the wind changed direction?
After one week, review your notes. Try to answer questions like:
Colours up above: A northern lights craft
Waterton Lakes is south of the other mountain national parks but is not to far south to see northern lights. The park is part of the Waterton-Glacier International Dark Sky Preserve and dark skies mean plenty of opportunities to witness this beautiful phenomenon – when conditions are right.
What are northern lights?
Aurora Borealis (commonly called northern lights) are caused by sun storms. The sun storm produces large blasts of electromagnetic particles. The particles travel to earth and slam into the atmosphere. This collision creates flashes of colorful light that fill the night sky. Earth's magnetic field sends the charged particles towards the north and south poles (there are southern lights too!).
Learn more about the science of northern lights by visiting the Canada Space Agency website!
‘Tis the season
Northern lights may be especially bright during late March, near the spring equinox.
Spring equinox is the moment when earth’s northern and southern hemispheres experience equal amounts of daylight and darkness. It marks the transition from winter into spring and summer into fall. The position of the sun relative to the earth means the earth encounters strong solar winds from solar storms. This means more nights of awesome northern lights!
Northern lights are best viewed in very dark skies with minimal light pollution. Have you tried seeing the northern lights from your home? If you can’t get to dark skies this spring, follow the craft instructions below to bring northern lights right to your home!
Activity: Craft a northern lights scene
What you'll need
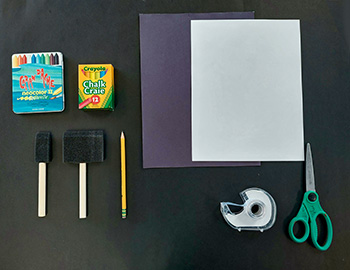
- Black construction paper
- White printer paper
- Pencil
- Colored chalk
- Scissors
- Scotch tape
- Cotton ball/pad or sponge
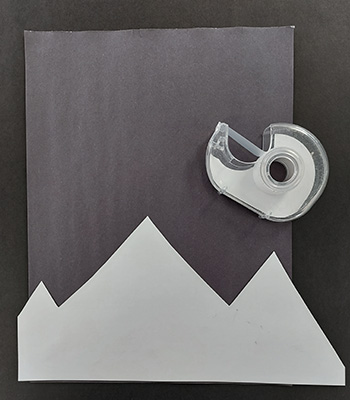
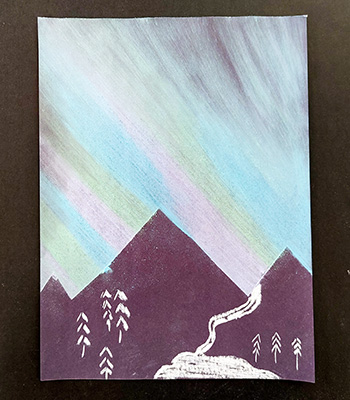
Step One: Make a landscape stencil
Decide where you want to create your northern lights - dancing above mountains? Twirling through a forest?
Lightly sketch the outline on the white paper. Once your stencil outline is complete, cut the shape out.
Place the landscape stencil on the black construction paper. Gently place some scotch tape on the backside of the stencil to help hold it in place.
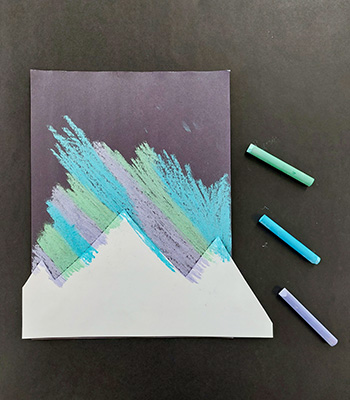
Step Two: Let there be (northern) light!
Use coloured chalk to color your night sky. Create bold stripes of color. Make your stripes large or small, swirl your stripes - be inspired by the magic of the northern lights!
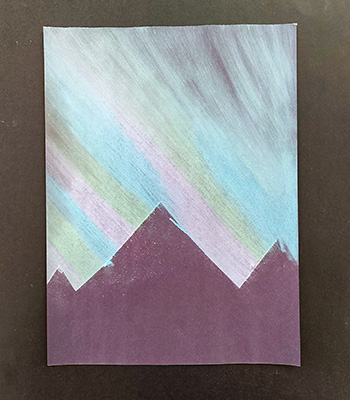
Step Three: Blend
Use a cotton ball or a sponge to blend your colors together. Start at the edge of the white stencil and brush your chalk upwards to the top edge of the black paper. This stage can get a little messy!
Step Four: Final touches
Remove your stencil to reveal your landscape and use chalk to add more details, maybe some trees and a lake.
Bird watching 101
A bird watcher? Me? Yes, you!
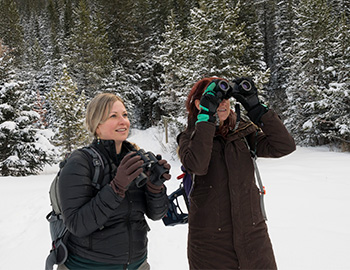
You don’t have to be an expert; anyone can be a bird watcher.
Bird watching is observing and identifying birds in their natural habitat. It can be as simple as looking for the birds that are in your own backyard.
Bird watching for beginners
Bird identification field guides, books and apps are a bird watcher’s best friend – there are tools that will help you get started.
What if I don’t know anything about birds?
Here are four questions to ask yourself when you see a bird. Use them, along with your field guide to get birdin’.

1. Where are you?
Bird watching is about tuning into your surroundings. The best way to know what type of bird you might be observing is to first observe where you are. Are you near a lake, in a parking lot, a farmer’s field, or deep in a forest? Different birds live in different habitats - a bird that loves water, like a duck, is more likely to be observed near water. Noticing your environment is the first step in determining what bird is in view.
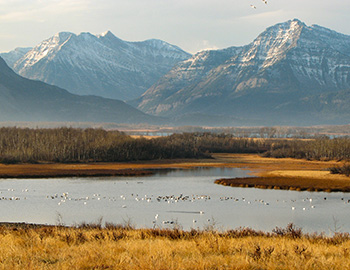
2. What season is it?
Birds are migratory. They travel long distances to find seasonal habitat. They will often spend the summer months in a very different place than where they spend winters.
Over 255 species of birds have been observed at Waterton Lakes National Park. But only 37 of those species live in the park all year round. The other 215 species are just passing through!
If you see or hear a songbird in wintertime, use your field guide to find out which songbirds spend the winter in your area. You are now well on your way to identifying a bird!
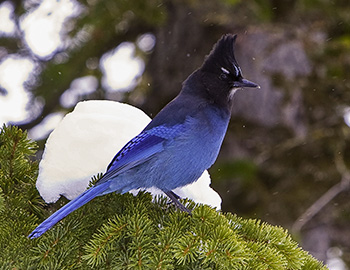
3. What is it doing?
Watch the bird. What is it doing? Is it flying? Is it swimming? Is it eating seeds or worms? Is it hunting?
Not all birds eat, fly, or travel in the same way. A hawk will hunt for food high in the sky. A robin will nibble on insects that it finds in grass. Use your field guide to research the behaviour of different kinds of birds.
4. How big is the bird?
Size is one of the most important (and straight forward) factors in bird identification. A songbird will be a different size than a bird of prey. Keep size in mind while you look for your bird in your field guide.
Planning a visit to the park? Bird watching in Waterton Lakes
At-home avalanche
When exploring Waterton Lakes in the winter - you may be in avalanche terrain. Anytime there is snow and slope, an avalanche may occur.
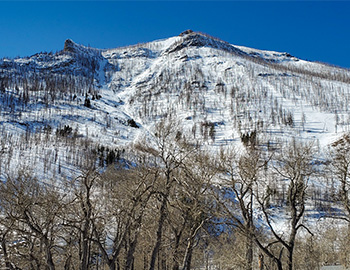
What is an avalanche?
An avalanche is when a large amount of snow and ice falls suddenly down a mountain. Avalanches don't happen every day in the mountains, but certain weather conditions can increase the chance of one.
Not all snow is the same
Sometimes snow will be dense, sticky and wet. Sometimes it will be loose, fluffy and dry. Snow can look and feel different depending on the temperature and amount of moisture in the air when it falls.
Layers in the snow are formed as new snow falls. Dense, sticky layers are very strong - you can walk on this snow without breaking through. This snow is also perfect for making a snowman! Loose, dry snow is weak – you may sink in!
Built-up layers of snow are called a snowpack and each layer of snow is called a slab. When weak and strong slabs stack on top of each other, the snowpack becomes unstable, increasing the likelihood of an avalanche happening.
Activity: Your very own avalanche at home
Discover how strong and weak layers of snow create conditions for avalanches.
Activity instructions
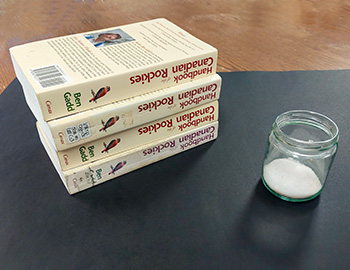
What you'll need
- Three or more heavy books
- Some salt or sugar
- A flat surface
Make your snowpack
Stack two heavy books on top of each other on a flat surface.
These books represent two strong layers of snow. An avalanche needs both snow and slope - the books are your snow. Try creating a slope by slowly lifting an edge of the bottom book.
How long does it take for the top slab to slide off of the bottom?
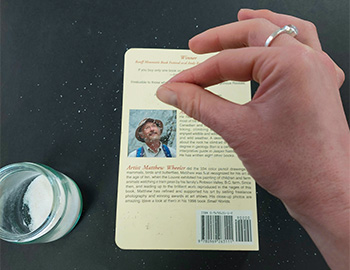
Add a weak slab
Sprinkle a layer of salt or sugar between the two books. This is your layer of dry, weak snow. Try creating the slope again by slowly lifting an edge of the bottom book.
Does the top slab slide faster or slower this time?
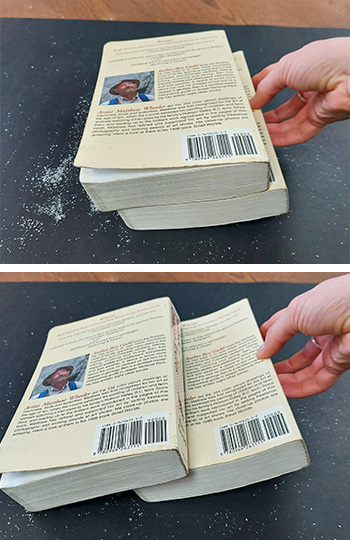
Add a trigger
Avalanches may occur on their own when the snowpack is unstable, but usually they need a trigger. It may be a skier or a snowmobile – anything that could add extra pressure, causing the slabs to wobble and eventually slide. Place one more book on top of your snow slabs - this represents the trigger or added pressure.
One more time, slowly lift the edge of the bottom book.
Did your avalanche happen faster this time?
You can also try creating different combinations of weak and strong layers to watch how they react. What happens when there are more weak layers than strong?
What about when you add one thick weak layer?
How do you think changes in weather may create more unstable layers and create more avalanches?
Be avalanche aware
In Waterton Lakes, the Visitor Safety Team uses science to observe snow slabs and predict the likelihood of avalanches. They use this information to publish a weekly avalanche bulletin.
Before heading out for a winter adventure, make sure to check the avalanche bulletin, Waterton Lakes’ avalanche terrain map and weather forecast for the area.
Know your needles: Conifer identification
Winter is here in Waterton Lakes! As a backyard naturalist, winter can be a tough time to identify plant species. In spring, summer and fall, you can identify a plant is by looking at its fruit, flowers, and leaves. These plant parts are usually missing in the winter.
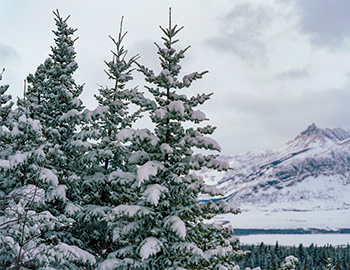
But not all plants lose their leaves when the snow flies. Enter the conifer!
The conifer
Conifers are a type of tree that keep their leaves - in a distinct needle shape - during the winter. Think of your classic Christmas tree – that’s a conifer!
A coniferous tree not only produces needle-shaped leaves; it produces fruit called cones. We often call its woody, spikey fruit pinecones; but the pine is only one type of conifer.
In Alberta, you are likely to encounter three different types of conifer: pine, fir, and spruce. Let’s learn how to tell the difference between these three types of evergreens!
Their needles
With practice, you can identify a conifer just by looking at its needles. Let’s learn how:
Step one: Find a conifer
Go for a walk and see if you can find a tree with needles. If you decorate a live tree for the holidays, you may have brought one right into your home!
Step two: Use your senses
Look closely at the tree’s branches. Do the needles come out of the branch in groups or clusters, or does one single needle grow out of the branch? How long are the needles?
Touch the needles. Poke the tip of the needle with your finger. Is it pointy and stiff, or rounded and bendy? Gently shake hands with the tree branch. Does it feel spiky and sharp, or soft? Roll a single needle between your fingers. Does it roll easily and feels like it there are edges or corners, or is it hard to roll and feels flat?
Smell the needles. Very gently squish the needles in your hand. Inhale! What do you smell? Do you like the scent? Is this tree very smelly, or not-so-much? What words would you use to describe this smell?
ID your tree
You’ve used your senses to get to know your conifer, so let’s figure out what type of conifer you have found.
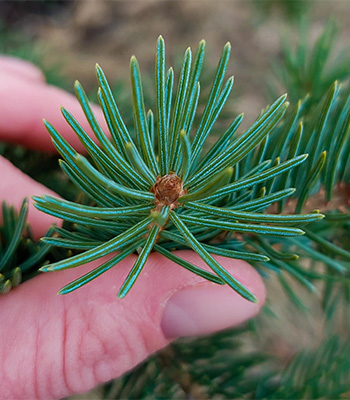
Spruce: Square, spiky, stiff
- Single needles grow directly from the branch;
- The tip of the needle is spikey and sharp to touch;
- There are edges on the needle – it’s square in shape;
- You can easily roll this stiff needle between your fingers.
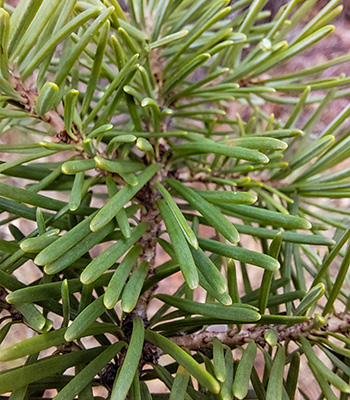
Fir: Flat and flexible
- Needles grow directly from the branch;
- The needle is flat and the tip is rounded;
- Needles easily bend;
- This tree is quite soft – no spikes poking your hand;
- Has a very strong, almost citrus-like smell.
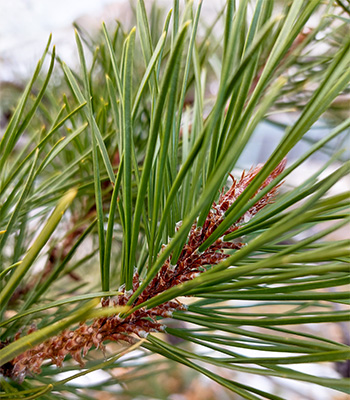
Pine: Pointy pairs and a paper-y bud
- Lodgepole pine is the provincial tree of Alberta. Its needles grow in clusters of two;
- Needles grow from a nodule or bud (called a fascicle sheath), that is covered in material that feels like tissue paper;
- The tip of the needle is pointy;
- Pine needles are usually longer than one belonging to fir or spruce trees.
BONUS! Waterton Lakes National Park is home to two very special pine trees – their needles that grow in clusters of five. These endangered trees live high in the mountains and need our help.
Parks Canada’s conservation work with whitebark and limber pines
Make-a-moon craft
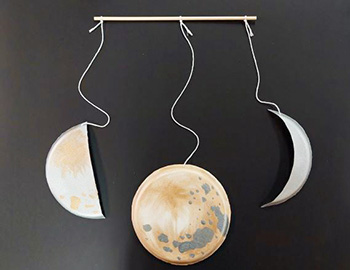
This autumn, our interpretation team here in Waterton Lakes is celebrating our International Dark Sky Preserve designation. As the nights begin to get darker and longer, we can better connect all the wonders of the night sky, including earth’s closest cosmic buddy, the Moon!
Moon Phases
When you look up at night and see the Moon, you might notice that it does not always appear to be the same shape. Sometimes the Moon is a big circle, other times it is just a little sliver. These different shapes are what is known as the ‘phases of the Moon’ and they follow a special cycle – the Lunar cycle.
The Lunar cycle
The Moon is Earth’s only natural satellite (a celestial body that orbits a planet). It takes the Moon about 28 days to make a full trip around the Earth – a lunar month. During the lunar month, the Moon looks like it changes shape. The Moon isn’t actually changing, what’s changing is our view of it here on Earth.
As it orbits the Earth, the Sun lights up different parts of the Moon, making it look like it’s changing shape. The Moon does not create its own light. The moonlight we see is the Sun’s light reflecting off the surface of the Moon.
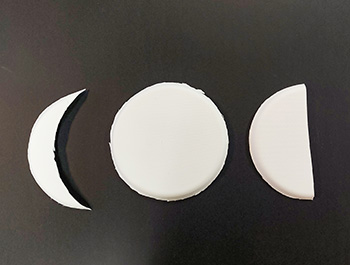
The big round shape is the Full Moon phase. The half-moon shape is called the Quarter Moon phase, and that little banana-like sliver is called the Crescent Moon phase.
Follow the instructions below to learn about the Moon’s phases and how to build your very own Moon mobile.
Activity instructions
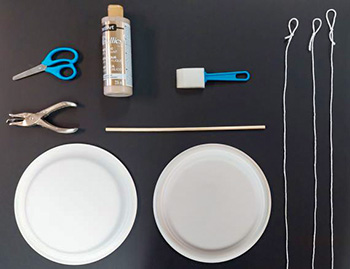
Materials needed
- 2 paper plates
- 1 wooden dowel
- 3 pieces of string
- Scissors
- Pencil
- Paint, paint brushes
- Hole punch
Instructions
- Take one of the paper plates and cut it in half.
- Cut the rim off of both plates halves. Set one of these halves aside. This is your quarter moon!
- Take one of the rims that you cut off the plates and use the curved edge to trace a crescent shape onto the second half of your cut plate.
- Cut along the pencil line: now you have your crescent moon shape!
- Next, cut off the rim of the full paper plate. This is now your full moon shape!
- Recycle any un wanted pieces of paper plate.
Paint
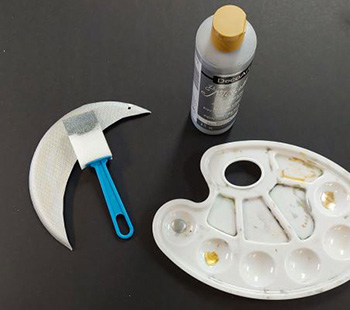
Paint your moon shapes any color you want! The Moon has many ‘craters’ and mountains and valleys on its rocky surface.
Don’t be afraid to get creative! Add shapes and textures with the paint.
Hole punch time!
When the paint is dry, punch a hole at the top of each shape.
Hang your moon!

- Use a piece of string and thread one end through the hole in your moon.
Tie a knot to secure it. Do this with all three moons - Take the other end of the string and secure it to the wooden dowel by tying a double knot. Repeat for each moon shape.
Final Step: Admire your moon
The names of the shapes you have created are Full Moon, Quarter Moon, and Crescent Moon. Think about where you will want to hang it in your home. Make sure it is in a place that will remind you to look for the moon and get to know its phases as the sky gets darker this fall.
- Date modified :
